Cricket Song Farm

Cricket Song Farm

Friday, December 28, 2012

GREEN HUBBARD

                                                       Winter squash baking in the oven.
                                           The smell is heavenly as you come in from the cold.


  The large green Hubbard is a beautiful addition to any garden.  Plant seed after the soil has completely warmed.  It needs room to grow, it's vines can grow up to 15 feet in length.  After fruit has set, cut the ends off the runners to promote ripening.  It produces several squash on each runner.    It seems to handle my cold summer nights and short growing season better than other winter squash varieties.  (I can only bring  a crop of banana to maturity about every 5 years, but I harvest Hubbard every year).  It's rind is tough and the orange flesh is about an inch thick.  The seed cavity is large with large seeds.  I have roasted the seed, but they are not palatable. Save the seeds from your largest, fastest maturing squash for next years crop.   The green Hubbard is not as sweet as the buttercup, butternut or banana squash,  for that reason I prefer the Hubbard.


immature fruit growing on the fence

to save space
it can be trellised if you plant the smaller baby varieties
 or support the larger squash as it grows with
a sling


my favorite way to prepare green Hubbard is to skin it  (be careful it is very difficult to do)
cut in half and
remove the seeds
scrape the inside clean
cut into 1 inch cubes
season with olive oil
roast at 350 degrees until soft
add other root crops to the pan if desired
beets, turnips, carrots, and parsnips
stir often to prevent sticking and burning


GREEN HUBBARD SOUP

3 tbs. olive oil
3 cloves minced garlic
1-2 shallots chopped
1 tbs. coriander
1/2 tsp. fennel seed
1&1/2 tsp. dried sage
3 medium carrots chopped
5 cups chicken broth (or vegetable broth)
1 cup heavy cream (optional)
I prepare this soup using about 6 cups of the  roasted squash (instructions above)

In a large sauce pan boil broth and carrots until the carrots are cooked, meanwhile in a cast iron skillet saute the garlic, shallots, coriander and fennel seeds.

In a food processor place the cubed, roasted, squash
 pulse to slightly break down the squash.
Remove cooked carrots from the broth and add to the squash.  Add the dried sage. Pour in the hot  broth as you puree the squash and carrots, using enough broth to make a smooth, thick soup.  Add the sauteed garlic and onion mixture. Puree.  Add more broth if needed.
Pour soup into a large sauce pan and slowly heat through.  Add cream. Stir constantly over med. low heat until ready to serve.
Sprinkle the top with fresh chives if available 


To bake
cut in half and remove seeds
place flesh side down on a baking sheet
350 degrees until a fork can pierce the rind and the flesh is soft


Green Hubbard's can grow to a very large size

my shoe helps to show how large this squash can grow


The green Hubbard matures in about 90 to 105 days
it can weigh up to 20 pounds
an excellent keeper
store in a cool dry place

I will be delivering winter squash to the St. George area Jan. 24, 25 &26.  I have spaghetti, turk's turban and green hubbard available
$1.00 a pound delivered
$.75 cents a pound farm pick-up.

Wednesday, December 26, 2012

A SAGEBRUSH TREE

 
Walked out the back door into a beautiful day for tree hunting.
My breath is taken away, not from the cold, but from the beauty that surrounds me.


the tree  bush hunters


cutting off the perfect sagebrush


out to the compost heap to unearth some corn husks to make a tree angel


sage blossoms and sparkly earring post make a beautiful halo


can't find the box with the tree ornaments (it must be up north)
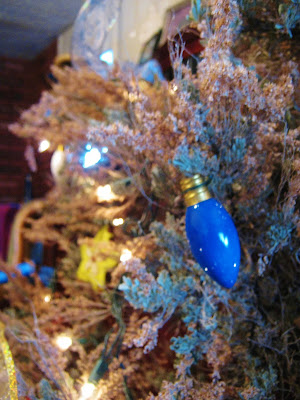
so the large white and blue Christmas light bulbs will do just fine
with bits of colored ribbon draped through the silvery branches
and spicy gingerbread cookies 
 our little tree will be
something magical and wonderful


the branches are covered with silver leaves and capped with frilly blossoms 


This beautiful tree is my favorite Christmas Tradition.


Do you have a unique or special Christmas Tradition?  Please share it with us.


Saturday, December 22, 2012

CHRISTMAS TRADITIONS


GINGERBREAD COOKIES

every year we make and decorate gingerbread cookies to hang as our tree decorations
on Christmas morning
breakfast is a
cookie, a glass of milk
and
an orange
from the stocking


Jake's rendition of the guiding star
I think it is beautiful


 5, no 4 snowman in a row-----"Hey guys, what happened to number 5?"


Glen's rendition of Mr. and Mrs. Clause
quite frankly I think they
are kinda spooky


These aren't any better
Does he need
an evaluation?


GINGER BREAD COOKIES
 (double  recipe for enough to decorate a tree)

CREAM TOGETHER:
1 egg
1/2 cup sugar
1/2 cup butter

ADD:
1/2 cup molasses
1 tsp. vanilla

STIR IN:
3 cups flour
3/4 tsp. soda
1/2 tsp. cinnamon
1/8 tsp. cloves
1/2 to 1 tsp. ginger

Refrigerate overnight
roll out dough in powdered sugar 1/4 inch thick

BAKE: 350 degrees for 6-8 minutes


My FAVORITE Christmas tradition is our Christmas Tree.

It all started quite by accident.  Years ago we traveled down to the farm to spend the holiday, but the snow was so deep even the 4x4 Burbanator couldn't get us into the mountains to cut a tree.

Well, you can't have Christmas without a tree so what are we going to do.  I thought for a minute and  immediately knew the solution.  Rounding up the guys, we bundled up, grabbed an axe and trudged out the back door.  We didn't have to go far,  just about 20 yards from the back door we found the most beautiful Christmas tree.  It was not your typical green, piney smelling tree, but it did have beautiful grey foliage and smelled wonderful.  The spent blossoms hung delicately from it's branches creating a snowy, ice icicle effect.  With blue lights, gingerbread cookies, and candy canes, it looked BEAUTIFUL. 

Now every year we bundle up, go out the back door and cut our tree.
Yes, our tree is a
6 foot tall, bushy, elegant,

click here to read more


Friday, December 21, 2012

From our HEARTH to yours

 
At this special time of year I want to send everyone glad tidings and great JOY
from our home to yours'
we wish you
all
a
Merry CHRISTmas

 
For unto us this day is born
 a child
you will find him wrapped
 in
 swaddling clothes
lying
 in a manger
 
 
May PEACE and KINDNESS
 fill your holiday season.
 
 
From
the Simkins' Family


Thursday, December 13, 2012

HERBAL TEA for the FLU and COLDS


My favorite herbal tea for the cold and flu season is a combination of dried elderberries and rose hips.
I gather the hips from the wild dog rose that line the pasture fences or collect them high in the mountains while hiking in the fall.  Rose hips can also be purchased in Health Food Stores.  The  fully ripe elderberries are collected in  late summer.  I have a long row of bushes at the farm, but I have to be quick to harvest them before the birds eat them all.  They are dried and put away until winter.

As soon as the symptoms of the cold and flu are felt a large cup of tea with honey will usually stop it in it's tracks.  Works for us anyway.

                                                 ROSE HIP AND ELDERBERRY TEA

                                                        1/2 cup rose hips
                                                       1/2 cup elderberries
                                                        2 cups water

Bring the water to a boil.  Add hips and berries.  This tea needs to simmer at a low boil for 15 to 20 mins. to extract the healing proprieties from the berries.  Strain and add a large teaspoon of honey.
I reuse the hips and berries to make another cup or two of tea.  Drink 2 cups a day.

We also make a tea of HOREHOUND for a cold with congestion.  It grows as a weed here on the farm, but I have a large bush in the greenhouse in case we need it for a cold during the winter.  STEEP 2 tsp dried or 3 TBS fresh in 1 cup of  boiled water for 10 minutes.  Add honey, this tea is quite bitter.  Sip sparlingly throughout the day.  Large quanities of the herb act as a laxative.

Cough drops can also be made from the horehound.

Here is a recipe for horehound cough drops.  I haven't tried it, I buy my winters supply of drops from my local feed store.

OLD FASHIONED HOREHOUND CANDY

2-3 cups fresh horehound--use the leaves, stems and flowers----- or use 1 cup dried herb
1 quart water
3 cups brown sugar
1/2 cup corn syrup
1 tsp cream of tarter
1 tsp butter
1 tsp lemon juice

In a large sauce pan bring the herbs and water to a boil.  Steep for 15 minutes.  Strain through a cheese cloth and put 2 cups of the tea back into the sauce pan.  Add the sugar, corn syrup and cream of tartar.  Cook on a slow boil until 240 degrees and add the butter.  Continue cooking until the hard crack stage 300 degrees.  Remove from the heat and add the lemon juice.  Pour into an 8x8 greased pan and score when slightly cooled.


MULLEIN is valued here on the farm.  It  is one of my favorite herbs.  Use the tiny yellow flowers, picked fresh and steeped in olive oil for ear aches.  The leaves are made into a tea for coughs and congestion.  The large soft leaves are good to place in baby diapers to help prevent diaper rash.  A sister of mine jokingly said to me, " I bet you even grow something at your farm to use as toilet paper."   I smiled and replied " YEP!"


MULLEN is a biannual and will self seed easily.  The large stalk is sent up in it's second year.  In the upper right of this photo you can see just the leaves of the mullein.  This plant is in it's first year.  Look closely and you can see the tiny yellow flowers on the tall staff of the mullein in the fore ground.  We just let mullein grow where ever it wants.  It doesn't need much water, but they tend to gravitate to the edges of the outside of the greenhouses.  I also let one or two grow in the greenhouse to allow for longer harvest of the plant.


Sunday, December 9, 2012

Cover Crops

a cover crop of lambs quarter
yes, it's a weed
 
Soil that is not refueled with organic matter (humus, compost, green manure) will eventually become lifeless and will not support the growth of plants.
Decomposing matter allows air to plant roots, and enables the soil to absorb and retain moisture.  It produces carbonic acid which help dissolve soil nutrients to be taken up by the plant roots.  Worms will migrate to garden areas with organic matter tilled into the soil and leave their casting to nourish the plants.
An easy and quick method to add organic matter to your soil is to plant cover crops. 
 
Cover crops can be planted in the fall and tilled into the soil just before frost, or allowed to freeze and be left to cover and hold the soil over the winter.  If you have planted a perennial such as winter rye the growth will begin again in the early spring and the new growth will then be tilled under before you begin planting.
 
Depending on the part of the country you live in will determine the type of cover crop used.
 
SPRING:  plant peas, spinach, or lettuce that will sprout early in the season.  Till under when 4 or 5 inches tall.
 
SUMMER:  buckwheat is the recommended choice.  It grows well in dry, hot, summer weather and the clusters of stems help to shade the ground thus helping to retain moisture
.
FALL:  winter rye, alfalfa,   plant in late summer and let winter over.  Till in early spring.
 
Here in the short growing season of the high Western dessert I have found that letting the weeds go to seed in the fall and then tilling them under in the spring after they have grown 3 or 4 inches tall works very well. The weeds sprout and grow earlier than I can plant so after they are tilled under I immediately plant the vegetable seed and hopefully the vegetables will out-grow the weed seed that has been brought to the surface. 
 
One year I used several old 25 pound bags of pinto beans that needed to be rotated out of my food storage as a cover crop.   I was pleasantly surprised how well they grew.  Planted in long rows 6 inches apart created a lush mat of green.   Legume crops (peas, and beans) fix nitrogen in their leaves and roots releasing it into the soil.  After they grew a foot high I tilled them under. The area was then planted with a vegetable requiring  high levels of nitrogen.  
 
Here are a few suggestions to plant as cover crops:
 
alfalfa 
hairy vetch 
cow peas 
peas
beans
oats 
barley
winter rye
clovers
oats
WEEDS, my favorite
 
Cover crops are a good source of nitrogen, which is essential to plant growth. 
The USDA reports that a good growth of a winter cover crop turned under 3 to 4 weeks before planting corn will produce as much corn as adding 250 to 500 pounds of fertilizer.
 
If you have room in your garden it is a good practice to rotate the land using cover crops.
 
The first spring we acquired our farm we planted crested wheat and rye over a small 3 acre parcel of land.  We did not have any equipment to do the planting so we broadcast the seed by hand and then tied an old metal bed-spring behind the pick-up with a long rope, piled the 5 kids on the springs for weight and drove over the field.  They laughed, would stand and try to "surf" the dirt and had to fall off once in a while.  Who says work can't be fun? 
 
What have you used as cover crops?

Wednesday, December 5, 2012

The $2,600 stew hen

Ya, you read it right, a two thousand six hundred dollar stew hen.  How might you ask can an old barn yard hen cost almost 3K?  Well you know I do put a big value on the girls and they do produce the very best eggs, but I will admit that I even won't put that much worth on one of my gal's, not even my favorites.  So why did this hen have so much value?.......no...... she did not lay golden eggs.
  She was just a regular ole back-yard, barn-yard hen.


You see it all began when I got a call asking if I would like a purebred registered Golden Lab.  Her name was Annie.  A beautiful dog and she immediately fit right in with the family.  We then were given a Chocolate Lab male,  had a batch of puppies and not one chocolate among the bunch, a couple of black and a couple of golden.  Well time passed and the puppies were all given away. The chocolate male disappeared.  Annie had full run of the farm and never thought about eating chickens or other livestock until  a few years later, the neighbor's dog began getting through the fence and killing the hens.   Annie being observant then realized that dogs liked to chase, kill and eat chickens.

A few weeks prior to her killing her first hen someone who had gotten a male black lab (now grown) from us just unexpectedly dropped it off back at our house.......bad timing, puppies were inevitable.

So one morning I hear this awful squawking and run out to find Annie with a half dead hen clasped in her jaws.  I pried it out and assessing it, realized that it could not be saved so I did what had to be done and put it in the stew pot.  I had a talk with Annie and told her I could not have a dog on the farm that killed the livestock and that she would be going to a new home. ( I know this sounds heartless, but once they start killing they never stop).   Friends of friends wanted a Golden Lab and didn't care if she was expecting.  So off we sent her to her new home, a place in the country with plenty of room and kids to love her.  Several weeks later we got a call, 15 puppies, 13 chocolate and two golden, well they sold the chocolate puppies for $200.00 dollars each.

 If I would have known that blasted hen was going to cost me $2,600.00 I would have at least made a fancy dessert to add to the meal.


Monday, November 26, 2012

Work is a BLESSING


Hope everyone had a wonderful and memorable Thanksgiving.  We traveled down to the farm and spent time with both sides of the family.  I had all my kids, their spouses and my grandson for the Holiday.  We had such an amazing time.  I took advantage of all the "help".  Well, with only standing room in the little red house we needed something to do other than stepping on each others toes.
I promised they could have Thanksgiving Day off and then it was work, work, work for the next couple of days.
 We went deep into the mountains after a big load of wood,


 watched the most beautiful pinto and line-back-dun mustangs run through the brush with their long tails and manes flowing in the wind, honked before we went over every cattle-guard, about 10 of them, to warn the troll's so we wouldn't run over their fingers.  My cute little daughter in-law insisted we honk ( she sure fit's in with our crazy bunch)
              
                                                      we laid pennies on the train tracks


                                                              and danced on the rails


                     We hand- tilled the gardens after digging out all the sunflowers and weeds.
                              Cleaned out the big greenhouse and planted garlic and onions.


Collected seeds of chard, purple and white heirloom carrots, aragula and lettuce.
 Played basketball, trimmed the goat's hooves, moved the buck in with the does, cooked almost non-stop and had the best slumber parties with all the family wall to wall on the floor.......remember, it is a little house.
Made cookie s'mores outside after dark in the freezing cold, but warmed by the fire, and even had time for a game of scum.
Whew, I'm exhausted.
  And then we had to leave the serenity and peace (and relaxation) of the farm and travel in bumper to bumper holiday freeway  traffic for hours and hours, but it was worth it. 

                                                                     I  am truly BLESSED.
                                                           Too many blessings to even count!
                                                 

Sunday, November 18, 2012

AROUND THE KITCHEN TABLE

This post was inspired by my little sis.  She just built a kitchen table of her dreams, a long, sturdy table, ready to hold up 6 sets of little elbows.  It made me stop to think of how important the kitchen table is.  It stands ready and waiting for after school snack crumbs to be scattered across it's surface,  it's legs kicked by muddy shoes, and forks stabbed into it's grainy top.
Meals shared with family, friends, neighbors, and the occasional lost wanderer.

                                          We have had several kitchen tables over the years.

 Our first table, Grandma Bower's little metal table, sat in the kitchen of an old, old, home we rented when my husband first taught school.  It now resides beside the milk stanchion.


  Our next table and chairs Glen made out of pine boards.  We used an old, second-hand metal outdoor dinning set, we repainted it and replaced the top of the table and the back and bottom of the chairs with pine boards to match the kitchen counters and cupboards he custom built for the kitchen ......... that he had to replace when he came home from work and discovered I had torn them all out and put in a heap on the front lawn.........well, they were ugly fiberboard, old second hand trailer house cupboard that had been put in a house we had just purchased.  It took several years for him to get the cupboards built, but they were beautiful when he got them finished............wish I had a picture of them.


Here's an old barn door we used for a coffee table for many years.
It sat on 12 inch cedar logs we brought in from the wood pile.
Jeramie, my oldest, had lot's of tea parties at this table
 Sassy, the cat, always enjoyed them
and the stroller rides after tea
honestly, this cat would sit in the stroller for hours


here is our table we had in Nevada
an old, old antique
wide- wood, hand- hewn, planked
that I painted bright blue
I let the kids pick out their favorite colors to paint their chairs
red, yellow, blue, green

cute little Meadow is now married
and mentioned to me the other day that isn't is funny that
the style now-days is old, painted, distressed, furniture
and back then is was just necessity for us to
make old second-hand items look great
with a new coat of paint.......
well, I did remind her I also fed her home-made goat cheese
and people thought we were NUTS
and now you find it in all the fancy restaurants


The blue table was replaced with this table that had a bench so it could be slid up to the wall.
We had just bought the single wide mobile home and moved it on the farm.   There wasn't much room, but it sure beat living the prior 6 months in a tent with 5 kids, the youngest being 3 weeks old.
 
The kids drew with markers all over the bottom underneath, I was saddened when we moved yet again and sold this table with the priceless art work underneath.  I have decided that over the holidays we are going to be drawing with markers under the kitchen table in the little red house at the farm......just  because that's what we do at our house.  Oh, we still have the blue table.


This is my favorite table
Glen built this over 40 years ago
we eat all our meals during the summer
outside under the trees
around this table
we reminisce of years gone buy
joys and sorrows
we laugh until our sides hurt
 
 
As Thanksgiving is just around the corner, let's all gather around the table, weather it be large or small, fancy and ornate, or held together with baling wire,  and enjoy the good food, the company, and express our gratitude for the blessing of family and a table to gather around.


Monday, November 12, 2012

SQUASH PIE/PUMPKIN PIE


Been makin pies.
pumpkin pie
squash pie
apple pie
It's the pie makin time of year. 
 
 
Here is my all time favorite recipe for squash or pumpkin pie
 
 
First make 2 pie crusts using LARD
yes, lard
I have had enough close calls in my life to realize how short is it
so 
use LARD
I don't have a recipe for the crust
just get a bunch of flour
add some salt
stir
add LARD
crumble it into the flour with your hands
I was taught how to make pie crust by my neighbor
HE always said add enough lard to form small peas
add cold water to make a stiff dough
(I'm sure there is a good recipe out there for pie crust)
 
o.k.
now for the pie
cut up your pumpkin or squash into large pieces
place on a baking sheet
or just on the baking rack
 
 
bake 350 degrees til soft
 
 
don't throw away the seeds
 
 
put them aside to make roasted pumpkin seeds
 
 
(Don't wash the seeds, just spread out on a large baking sheet and cook in a low 250 degree oven until seeds are dry.  Stir often.)
Note:  don't use squash seeds to roast, they do not work as well
and aren't very tasty
 
 
scoop flesh into a bowl, mash or puree
I like to freeze 4 cups in a bag so I can just grab a bag pre-measured for pies
drain off liquid after thawing
 
YUMMY PUMPKIN PIE
 
makes 2  pies
 
4 cups pumpkin or squash pulp (I especially like Banana Squash)
6 eggs
 1 cup sugar
1 can evaporated milk
1/2 to 1 tsp. each cinnamon, nutmeg, ginger
1/2 tsp. cloves
Bake 10 mins at 450 degrees
turn oven to 350
and bake until a knife inserted comes out clean
about 35-45 mins
 
This is almost like a thick custard or pudding. 
Absolutely delicious!
 
Top with REAL CREAM of course.


Saturday, November 10, 2012

What TIME is it?


I dislike the time change.  Now don't get me wrong I do enjoy having it light sooner after I am up for the day, and the long evenings spent around the nice warm fire because it's to dark to work outside.  I enjoy having the time to gather the kids around and read aloud from one of our favorite classical books.  No, what I dis-like about the time change is that for the next three months I will hear........ " Well, it's really not 8 o'clock, it would be 9 o'clock if we were on the other time."   For the past 28 years  I have been trying to tell my dear, sweet, wonderfully aggravating husband that
                                  "The time is what the time is!!!!!!!!"
We were out of town on Sunday, the day the time changed and I asked Glen, " Do you think the boy's will get up in time to go to their church meetings?"  Then I said,  "Well, they probably won't sleep in because it would really be like............."  and I stopped myself short.  I was NOT going to say it,  after hearing it for 28 years, I was NOT going to say it,  Glen just gave me a look and laughed.
 "Not funny," I replied.
On our way back to Roosevelt later that day, we stopped at my daughter Meadow's for a short visit.  During our conversation she said,  "I get to sleep in, in the morning."  "Oh," I asked, "Don't you have to be to work at 6:00 in the morning."   "Yes,"  she replied, "But with the time change it's like getting to sleep in for an extra hour."  WHAT?,    I GIVE UP, now a whole new generation of the family will be running around pretending what time it is.

I guess it's like the old song,  DOES ANYBODY REALLY KNOW WHAT TIME IT IS? 

Obviously not in my house hold,  but really, I am probably the worst, I never wear a watch and all I know is when it's light you get outside and do your work and when it's dark, you come in and do your work.  I do know this about time however.  It is a thief,  it stole away my precious little ones, it replaced my strong, healthy, skinny, long wavy haired being....... with an old, sore, can't get up once I get down, bone creaking, limping, greying haired, wrinkled faced, person. 
 It is an opportunist, allowing us to obtain our goals, to travel, to live.  So let's take advantage of every second, no matter what time it is.


Monday, October 29, 2012

PINE GUM SALVE

I consider myself one of the lucky ones on this beautiful earth.  I was raised in a small town, my grandparents lived next door and I gleaned from them all the traditions of self-reliance passed down generation to generation.  How to grow vegetables through the winter using solar pits dug on the south side  of the house foundation, heated with manure from the barn.  Using low tunnels to extend the seasons, the art of putting by, (canning), bread baking, butchering, things you read about in newly published books, the authors' acting like they had just invented this wonderful discovery, when all along it was the way of life not many years ago.


 I have fond memories of a childhood spent learning all I could about the simplicities of life.  I knew even way back then, that living close to the earth was a blessing and privilege.

PINE GUM--
We would gather the sap from the gnarly, twisted, pinion pine trees.  Grandma would look for just the right consistency in the sap and then removing the bark and needles she would pop it into her mouth  (pine...... gum).  I would also try to chew it, if the sap wasn't just right it would fall apart in your mouth leaving a bitter taste.  More often than not I would be spitting the crumbled bitter sap on the ground.  I eventually gave up trying to chew pine gum.  It is however good for the health of your gums.

The sap would be saved.  The fresh sticky sap would go into it's own container to be use directly on wounds, sores, etc, and the hard solid clumps would be added to rendered fat and made into PINE GUM SALVE.

We doctor animals and humans when they are wounded, it draws out wood, metal, or glass splinters, it takes away the sting of bees and wasps, or fire ant bites.  Eliminates the itch and swelling of mesquito bites.  Sooths chapped lips and hands.  Draws the infection from wounds and helps them heal.   Our medicine chest is contained in one bottle.  I figure if pine gum salve won't cure it then nothing will.  I have cured gangrene and horrible infections........ disclaimer ,once again please consult your doctor for any medical needs........


RECIPE FOR PINE GUM SALVE-----old fashioned way------

1 part mutton tallow , 2 parts pine gum (use a mixture of gums, the sticky clear, the fairly stiff yellow and the hardened deep orange)

Turpentine, Lysol, champor, or carbolic acid can be added if desired-------I usually don't------

Place in a tin can and heat on your wood stove for a couple of days--stir often

The impurities, bark and dirt will settle to the bottom of the can

Pour through a couple of layers of cheese cloth into jars

I have had this salve keep 7 to 10 years in a cool, dark, dry place


MUTTON TALLOW------collect the hard fat from around the kidneys as you are doing your fall butchering.  I have also used tallow from lambs and goats.  Do not use other animals fats.  They are not of a hard enough consistency.  Freeze the fat until you are ready to render it.
To render fat:
  Place in a cast iron pan and cook over low heat.  If I am doing a large amount I place it in a large bowl or dutch oven and use the oven on a low 250-300 degree setting.


rendering fat


strain liquid fat into a large bowl


add cold water to the fat
add enough water to allow the fat to rise above the water and form a
hard gel


the cold water will cause some of the fat to harden
stir until the fat is dissolved


place in the fridge or a cool place so the fat will harden
the impurities in the fat will be on the bottom
scrape all impurities off the block with the back of a knife
dig out any spots that may be embedded in the tallow
freeze tallow until needed


rendered fat and pine gum


place in a tin can and heat for several days on the wood stove
if you are unfortunate not to have a wood burning stove use a pan filled with water
on the stove top and simmer for 6 to 8 hours.  Add water as needed.


pour warm liquid into jars

NOTE:  if the consistency doesn't seem right reheat and add more fat for a more solid salve, and if it seems to solid--reheat and add more pine gum (my preference) or try adding a little olive oil or Vaseline


if you choose not to use animal by products try this: 
HERE ARE A COUPLE OF RECIPES WITHOUT USING TALLOW

1. 
Infuse pine gum sap in a pint jar filled with olive oil.  For this method the harder chunks of sap work best.  Break into small pieces.  Place in a warm spot (sunny south window) for 3 weeks shaking daily.  Pour strained oil into a tin can and either heat on a wood stove or in a hot water bath on the burner.  Add enough beeswax to make a solid salve. ( don't like this as well, I prefer salves with the sap as part of the salve, not just an infusion)


 2.
I invented this recipe after a long winter of cracked, dry hands


CRICKET'S HONEY PINE HAND CREAM

To 1 cup pine gum
add 1/2c.- 3/4c. tallow (or use shortening)
heat for several days on wood stove
strain through cheese cloth
return to heat
 add 1 small jar of Vaseline, about 4 oz.
2-4 tbs. honey
1/4 cup almond oil
 2-8 tbs. beeswax, ( depending on the consistency you like)
1 tsp. Castor oil (optional)
 4 capsules liquid vitamin E (drain contents from capsules)
 2 tbs. solid coconut oil
Heat all ingredients gently for several hours and pour into small jars.
use as a salve for dry hands and feet

If your hands are extremely chapped try this.  Use a liberal amount of the salve rubbing in well.  Place a large plastic bag over each hand and then a sock over the bag to keep it from falling off and leave on over night.  I don't recommend this overnight treatment for your face however:)!!!!!


3. 
1/2 c. pine gum
1/2c. honey comb with honey
Heat and pour into jars. 
 This smells wonderful.
  Use as a healing salve. 
 Honey also has beneficial healing properties.


4.
 Melt the sap in olive oil over low heat, simmer without boiling for 4 hours.  Strain.  Add beeswax.  Pour into jars when wax is melted.


Over 30 plus years of making this salve, my experience has been that the olive oil goes rancid faster than the tallow.

Please share any recipes or experiences you have had using this wonderful natural remedy.

THANKS FOR STOPPING BY!
Please visit my home page for the latest happenings on my little sustainable farm.


Click here for information about

I would love to have you sign up as a follower (in the right hand column) 
and please feel free to share this post with others.

FarmHer  JILL